
We last saw the Memory Tree in a post about a bridal shower for my friend, Cris. What we got back was amazing - so many cool pictures from her childhood, to high school, to some great moments when we were all living in the dorms at UCSB together.
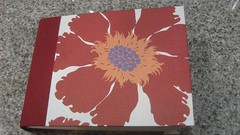
 My second step with this Memory Tree was to take all of the photos we got, add pictures from the shower itself, and later her wedding, and create an album. I chose one from Paper Source, and filled it to the rim with the photos.
I had lunch with Cris today and she was thrilled and it was really fun getting to see her go through all of the memories again. She asked if the pictures were the originals from her mom, and I assured her they were all copies. I'm so glad that the project turned out well and that she has a special keepsake from her many friends and family that helped create the album.
Here's a full list of steps for this project, should you want to try it for your next shower. I also think this might be a lot of fun for a surprise birthday party.
1. Ask everyone on the invite list for the shower/party to send pictures of the bride through the years. I offered that email was the easiest way, but if people only had hard copies/originals they could mail them to me, and I'd hand them back safe and sound at the shower.
2. After collecting (via email, picking up photos, getting them in the mail, etc) make copies on photo paper of each of these originals, and have them ready to hand back to the photo owners at the shower.
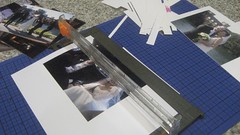
3. Attach each picture to a colorful background, punch two holes in the top of the paper (I used my my star shaped punch) and add a little ribbon to each.
3. Get a tree branch, vase and some sort of rocks/substrate for the vase to build your tree. You want to weigh down the vase so that it doesn't topple over with the height of your tree. I used an old glass flower vase, rocks I collected at the beach, and a friend cut a branch for me from his backyard.
4. Hang your photos from the branches. I tried to double them, back to back, so there wasn't any white showing when the tree was set up.
5. Place the tree in a prominent place at your party or shower. The guests will know the story of how it got put together, since they were each asked for photos. Your guest of honor will likely be delighted at seeing all of the photos of her through the years, with all of these delightful people.
Be sure and take plenty of pictures at your shower or party, you will want to put those in the album later.
 6. Take the tree down, and store accordingly. Keep all of the photos in a safe spot.
7. Purchase a photo album. There are pros and cons of when this happens. If you do it before you get all of the final photos, you will know the appropriate size backing to put on them so you only do it once (transferring the photos directly to the album, just removing the ribbons). I ended up buying the album after the fact, which was good because then I got it with enough pages to fit the number of pictures I had. I got the album I bought at Paper Source.
8. Get your photos developed and get photos of your shower/party from other participants.
9. If there is a big event after the shower (ie a wedding or the birth of a child), you might want to wait until after the event has occurred to finish your album, so that you can take pictures at the event and include them. Or, if this is for a birthday gift, you might want to include pictures of the party itself.
10. Get your photos ready for installation in the album. I had to pull all of mine off the colorful backgrounds, and chose to put new, red background paper on each photo before it went in the album. I also put them in chronological order, so it was easier to assemble. A final count revealed I had 18 places left for photos from the wedding, so I printed out that number.
11. Gather anything else you may want to put in the album - the invitation from your event, birth announcement, little notes from all the people at the shower or party - whatever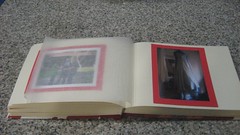 you have that can make it that much more special.
12. Place all of your photos in your album!
Finally, give your album to your friend / guest of honor and let them know about all the people who helped contribute. You put it together, but be sure and acknowledge those who helped.
My second step with this Memory Tree was to take all of the photos we got, add pictures from the shower itself, and later her wedding, and create an album. I chose one from Paper Source, and filled it to the rim with the photos.I had lunch with Cris today and she was thrilled and it was really fun getting to see her go through all of the memories again. She asked if the pictures were the originals from her mom, and I assured her they were all copies. I'm so glad that the project turned out well and that she has a special keepsake from her many friends and family that helped create the album.
Here's a full list of steps for this project, should you want to try it for your next shower. I also think this might be a lot of fun for a surprise birthday party.
1. Ask everyone on the invite list for the shower/party to send pictures of the bride through the years. I offered that email was the easiest way, but if people only had hard copies/originals they could mail them to me, and I'd hand them back safe and sound at the shower.
2. After collecting (via email, picking up photos, getting them in the mail, etc) make copies on photo paper of each of these originals, and have them ready to hand back to the photo owners at the shower.
3. Attach each picture to a colorful background, punch two holes in the top of the paper (I used my my star shaped punch) and add a little ribbon to each.
3. Get a tree branch, vase and some sort of rocks/substrate for the vase to build your tree. You want to weigh down the vase so that it doesn't topple over with the height of your tree. I used an old glass flower vase, rocks I collected at the beach, and a friend cut a branch for me from his backyard.
4. Hang your photos from the branches. I tried to double them, back to back, so there wasn't any white showing when the tree was set up.
5. Place the tree in a prominent place at your party or shower. The guests will know the story of how it got put together, since they were each asked for photos. Your guest of honor will likely be delighted at seeing all of the photos of her through the years, with all of these delightful people.
Be sure and take plenty of pictures at your shower or party, you will want to put those in the album later.
6. Take the tree down, and store accordingly. Keep all of the photos in a safe spot.7. Purchase a photo album. There are pros and cons of when this happens. If you do it before you get all of the final photos, you will know the appropriate size backing to put on them so you only do it once (transferring the photos directly to the album, just removing the ribbons). I ended up buying the album after the fact, which was good because then I got it with enough pages to fit the number of pictures I had. I got the album I bought at Paper Source.
8. Get your photos developed and get photos of your shower/party from other participants.
9. If there is a big event after the shower (ie a wedding or the birth of a child), you might want to wait until after the event has occurred to finish your album, so that you can take pictures at the event and include them. Or, if this is for a birthday gift, you might want to include pictures of the party itself.
10. Get your photos ready for installation in the album. I had
to pull all of mine off the colorful backgrounds, and chose to put new, red background paper on each photo before it went in the album. I also put them in chronological order, so it was easier to assemble. A final count revealed I had 18 places left for photos from the wedding, so I printed out that number.11. Gather anything else you may want to put in the album - the invitation from your event, birth announcement, little notes from all the people at the shower or party - whatever
you have that can make it that much more special.12. Place all of your photos in your album!
Finally, give your album to your friend / guest of honor and let them know about all the people who helped contribute. You put it together, but be sure and acknowledge those who helped.

0 Comments:
Post a Comment
<< Home